Handmade How-To: Botanical Note Cards Using Dingbats

DIY Botanical Notecards via Happy Hands Project

2014 is here! I hope you all had a great New Year’s Eve celebration. I’d like to start this year (and the 2nd year of Happy Hands Project… wee!) with a note card DIY. Botanical themes grew in popularity this year and making them is easy-peasy. There are a lot of wonderful greeting cards for sale out there, like these cards from Amy Sullivan and florals from Rifle Paper Co., but if you want to make some on your own, here’s an easy way to do it. And the best thing is, it’s all for free!

In this DIY, we will be making 2 A6 cards which will fit nicely into C6 envelopes. We will be working with Adobe Illustrator, a downloadable dingbat font, and another font of your choice to write a message on the card. I am using Illustrator CS6 on a Mac, as you will see on the photos that will follow.

Let’s get all the materials ready, shall we? First, download and install the font Arboris Folium. Then download this chalkboard background from Besotted. If you’re printing the cards right away, have your card stock ready, too, preferably between 200-250gsm.

{1}
Open a new document in Illustrator. Select an Artboard size, which should be the same size as the paper you’ll be using. In my case, I use A4. Click ‘Landscape’ for the Orientation so you’ll be laying out the cards nicely on a horizontal page.

DIY Botanical Notecards via Happy Hands Project

{2}
Make a rectangle using the rectangle tool (click M for the shortcut).  Position your pointer somewhere on the artboard and click once – enter the size 105mm x 148mm on the window that pops out. This will be how big your card will be.

DIY Botanical Notecards via Happy Hands Project

{3}
Place your background onto the artboard. Go to File, select Place, and locate the file ‘CHALKBOARD_TEXTURE_BB.jpg’. The image will be placed on top of the rectangle you just made earlier. Resize the chalkboard background to a size you like. Just make sure it’s bigger than your rectangle.

DIY Botanical Notecards via Happy Hands Project

{4}
Position your chalkboard background to the back of the rectangle – Object, select Arrange, then select Send to Back (click shift + cmd + [ for the shortcut). Now that the background is behind the rectangle, we can proceed with the masking. Masking the background means that it will take the shape of the rectangle above it.

{5}
Masking! Select both chalkboard and rectangle using your Selection Tool (hit V for the shortcut). Click Object – Clipping Mask – Make.

DIY Botanical Notecards via Happy Hands Project

DIY Botanical Notecards via Happy Hands Project

{6}
Pull out your Glyphs Panel. It’s time to select a botanical element for your card! Click on Window – Type – Glyphs, and a panel will come out. This window will be displaying the characters available in a certain font. Choose Arboris Folium font to see all the dingbats this font has. (Warning: Prepare to ooooh and aaaah. I love this font!)

DIY Botanical Notecards via Happy Hands Project

{7}
Time to pick a specific element that you like. To make it appear on your artboard, click the Text tool (shortcut: T) and click anywhere on your chalkboard. Change the text color to white and type in a huge text size. In my case I used 275 pt, but you can go lower or higher. You can always adjust it later. Once you’ve chosen an element, position it to your liking. I centered mine as you can see.

DIY Botanical Notecards via Happy Hands Project

{8}
Do you want a different element on the other card? Repeat the same process, and you’ll have 2 cards in no time.

DIY Botanical Notecards via Happy Hands Project

{9}
If you want to write a message anywhere on your card, select a font you like and lower the font size. How big your text will be is totally up to you. Just in case you’re curious, I used Cantoni DIY Wedding font by Debi Sementelli. It’s gorgeous.

That’s it! Load your card stock into your printer and you have 2 note cards! Happy writing, and have a wonderful New Year everyone!


Handmade How-To: DIY Golden Centerpiece

Gold Leaves Centerpiece via Happy Hands Project

We had an abundant supply of dried leaves around the neighborhood a couple of weeks ago, and I thought, why not transform these supposedly useless things into something useful? If you’ve read about my addiction with gold paint, you’ll understand why I came up with this DIY. I need to spray gold paint!

This is super easy, you’ll have a great centerpiece on an otherwise boring space in no time.

Here are the things I used:

  • A bunch of full, dried leaves (make sure they’re not torn!)
  • Gold spray paint (I used Pylox, but feel free to use another brand)
  • Newspapers
  • Wide-mouthed jars in various sizes and heights (I used 3)

Here’s how to make a simple centerpiece like I did:

{01}
Collect dried leaves. Select those that are not too small, but make sure you have a variety of sizes. I collected a lot but ended up selecting about 20. Oh, and it also helps to have an eager beaver little helper with a bag. Don’t ask me, she put that headband on her head saying it was her ‘crown’.

Gold Leaves Centerpiece via Happy Hands Project

{02}
Select the best leaves – use your judgement here. I retained those that were not too twisted or coiled. I also took some thin and wide ones.

Gold Leaves Centerpiece via Happy Hands Project

{03}
Set up your spray painting area! Make sure you are in a well-ventilated place and cover the floor with newspapers. Lay your leaves down and get your paint ready by shaking it for about 30 seconds.

{04}
Start with short bursts of paint directed to your leaves. Just spray lightly at first, moving around horizontally until all your leaves are gold. I kind of did a triple coating because I want my leaves to be rich gold.

Gold Leaves Centerpiece via Happy Hands Project

{05}
Leave your painted leaves to dry, which may take about half an hour to an hour, depending on how many coats of paint you sprayed. When they’re fully dry, turn them and start spraying the other side.

{06)
The fun part and finale! Gather your jars and start filling them with gold leaves. I found out that it’s nicer to use leaves of different lengths so that some stay in while the others stick out. It’s also nice to combine straight leaves with slightly curved ones.

Gold Leaves Centerpiece via Happy Hands Project

There you go! You can place it in your living room or dining table, or fill a shelf with lined up jars. You can also swirl some fairy lights around the jars for that Christmas vibe. I hope you’ll enjoy making these as much as I have!

Gold Leaves Centerpiece via Happy Hands Project


Handmade How-To: DIY Gold Note Cards


DIY Handmade Notecards-5


I used to be a silver-loving person. I just felt that silver is the most neutral metallic color, if there ever is such a thing. Until I laid my hands on my husband’s gold spray paint. Ever since I discovered how nicely it adhered to any type of surface, I just wanted to ‘Pylox’ everything that comes my way. No, really. I found out the gold paint covers my thick card stocks very smoothly, so I experimented making some note cards.


DIY Handmade Notecards-1


Here are the things I used:

  • A4 size card stock (I used a shimmery 250gsm card) plus a few extra ones
  • Gold spray paint (I used Pylox, but feel free to use another brand)
  • Rubber cutting mat and cutting materials
  • Ruler
  • Newspapers
  • Pens, markers and any writing instrument you prefer
  • Masking tape
  • Embellishments


I know not everyone has her own rubber mat, so some alternatives are a stack of newspapers or a large piece of cardboard box. You just need a cardboard that you can slash on that is thick enough to protect the surface underneath.

So are you ready to make personalized note cards? Let’s go!

{01}
Cut your card stock to desired size. I usually cut mine equally into 4 pieces, and they perfectly fit inside a C6 (114x162mm) envelope. Here’s a guide to envelope sizes if you need one.

{02}
Make use of your masking tape and extra card stock. Cut your tape and cover parts of your card that you want unpainted. Those clean spaces will be for your handwritten messages, embellishments or drawings. If you prefer having minimal paint and more writing space, use your extra cardboard to cover your note card. Tape the edges of the cardboard to keep them in place. On one of my cards, I cut a circle and stuck it onto the center of my note card. The center will remain white while the rest will be painted gold.

{03}
Set up your spray painting area! Make sure you are in a well-ventilated place and cover the floor with newspapers. If it’s windy, stick your cards onto the newspapers. One tape underneath will be easy enough to peel off.

{04}
Place your note cards on the covered floor. Shake your spray can for a minute or two to make sure the paint will be smooth when applied. Oh, and keep the cap on when you do so!

DIY Handmade Notecards-3

{05}
It’s time to start spraying! I hold my can about a foot from the note cards and spray lightly and quickly in a horizontal manner. I usually spray a second coat to make sure even the tiniest bits are covered. Leave your painted cards for about an hour to dry.

DIY Handmade Notecards-2

{06}
And now for the best part! I love peeling off masking tape to reveal straight edges. It’s also a nice surprise to see how each card would look like sans the strips of tape.

{07}
Decorate, embellish and write on your cards. The possibilities are endless. You can use strips of washi or fabric tape to prettify your works of art, or just use your favorite pen and doodle all you want.

DIY Handmade Notecards-6


Nothing beats a handmade card sent by snail mail, in my opinion. How would you ‘Pylox’ your cards? I’d love to see how they would look like! Tag me on Instagram.


DIY Handmade Notecards-7

Craft Haul From the Singapore Craft Fair


Inaugural Craft Fair Singapore

I have to be honest about this. Handmade Movement Singapore‘s inaugural craft fair made me giddy with excitement from the moment I learned about it – until days after it was over. See, I’m the kind of person who loves to shop. I go to flea markets, I shop for clothes even when I tell myself I shouldn’t… you get the picture. But this was my first craft fair visit. My first!

It was dark and rainy that day, the 19th of January, 2013. My husband and I trudged among puddles and muddy patches of grass to Fort Canning Green. I was amazed at how packed the tent was. Despite the heavy downpour, a lot of people still made it!

I specially loved the paper products there, but there were so much more – jewelry, baby clothes, hair bows and bands, pet clothes, food, pens… it was packed with handmade goodness! I went around and chanced upon Momo Shamu. My favorite item? Definitely the customizable camera bag. I will order from Momo Shamu when I finally buy a new cam! Aside from the fabric items, there were also some jewelry. I bought this oversized glittery ring in mint.

Singapore Craft Fair via Happy Hands Project

I bought a couple of post cards from these artists – E’von LeAngelis S and Chong Giin Song (below, respectively). These really inspire me to paint again.

Singapore Craft Fair via Happy Hands ProjectSingapore Craft Fair via Happy Hands Project

I had a hard time choosing which post card to buy from Beatrice Ng of HodgePodge. See, she does these amazing papercut artworks. I have always been fond of Singapore shophouses, and this print in green is perfect.

Singapore Craft Fair via Happy Hands Project

One cannot have too many notebooks, don’t you think? I was looking at the paper products from Murdoodles when my husband joined me, asking what I was about to buy. With a bit of embarassment (as he knows I have a ton of notebooks at home), I answered in a small voice, ‘a notebook’. Voice trailing, with a little uncertainty. I was so glad he agreed that I had to have that notebook! It’s in A6 with a canvas hardcover, unlined cream sheets, and beautifully bound.

Singapore Craft Fair via Happy Hands Project

Singapore Craft Fair via Happy Hands Project

We spent quite a lot of time on LoveSprout‘s table. I couldn’t decide which handmade rubber stamp to buy. There we were showed a catalogue of stamps with different faces, with one that matches hubby’s features! We finally decided on a block of rubber. Bad memories from my rubber cutting exercises from my Fine Arts university days came rushing back so I had to ask, ‘Is this easy enough to carve?’. I was relieved when they said yes. So it looks like we’ll be spending an afternoon having a husband-and-wife rubber cutting competition. I’m just wondering who the judges will be. Anyone?

The craft fair was an experience that left me inspired and amazed at the very talented crafters I met. I can’t wait for next year’s craft fair! Well done, Handmade Movement SG!

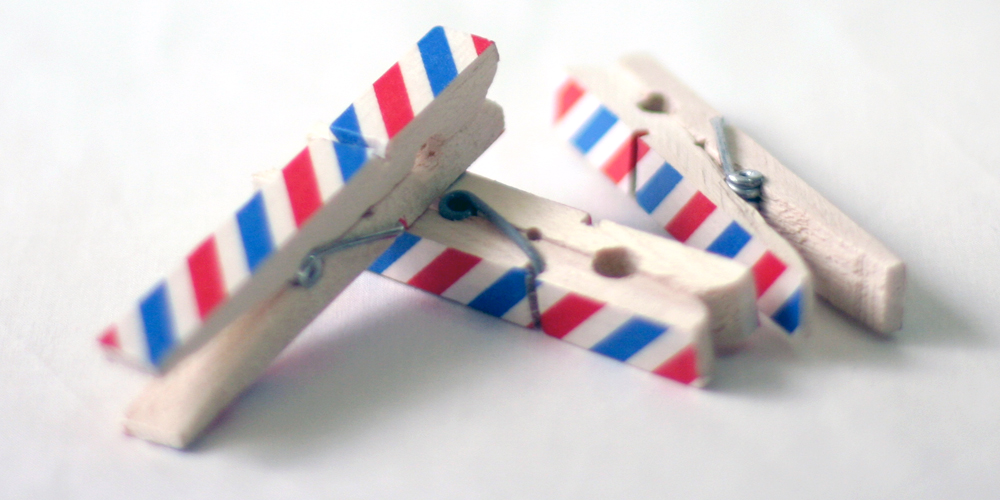
Washi Tape Covered Wooden Pegs


Wooden Pegs and Washi Tape DIY via Happy Hands Project

I love washi tape. I can hear a chorus of ladies screaming at me now, saying, “WHO DOESN’T?”. It has now been a staple in my treasure trove of crafting supplies.

I remember buying my first six rolls of mt Tape in Tokyo a few years ago, not really knowing what I’d do with them. Fast forward to 2013, and I’ve got rolls and rolls of these colorful paper tapes! I order them from all over – from US and HK shops in Etsy to local shops here in Singapore. You might say I’m a bit weird, because I have this certain attachment to things. I love my washi tape stash so much that I feel that every project I use it for should be useful, and working on it should be simple yet worthwhile.

Last month I was thinking of putting up buntings with my little family’s photos attached to wooden pegs. Well, I must admit I never got to printing the photos yet (let alone selecting which ones get printed!) so I started on ‘prettifying’ my pegs first. And this is so not a tutorial. This is something so straightforward that it doesn’t need much explanation!

Wooden Pegs and Washi Tape DIY via Happy Hands Project

All you need is a roll (or a dozen rolls – that’s up to you!) of washi tape, plain wooden pegs, a sharp cutter or X-Acto knife, and a rubber cutting mat or a stack of newspapers.


  1. Align one side of your tape to one side of your peg. Don’t worry about not getting it perfect the first time as washi tape doesn’t stick to the wood like Superglue. Just lift it and re-align.
  2. Turn the peg over and trim off the excess (make sure your newspapers are thick enough so as not to scratch the table’s surface!).
  3. Turn your tape-covered peg upright. Do you see a gap there? Cut the tape that covers the gap and carefully tuck the tape within that space.
  4. Do the same for the other side of your peg!


Ain’t it so fun and simple? I cannot wait to use these wooden pegs now.

Wooden Pegs and Washi Tape DIY via Happy Hands ProjectWooden Pegs and Washi Tape DIY via Happy Hands Project

SaveSave