
I’ve purchased my walnut ink crystals months ago when I went on an online shopping binge for calligraphy supplies. I finally had the time last weekend to open my jar and do a little test. I was surprised to see that the ‘crystals’ were not the coarse crystals I thought it would be. Confession: I imagined them to be big and coarse crystals, similar to bath salts. In reality, it’s coarse, dark, and in powder form – which actually makes sense as it has to be mixed with water to be able to use it as ink.
So what exactly are walnut ink crystals? It’s dry powder made from English peat moss (not walnuts!) that is mixed with water to use for calligraphy, painting and staining. Writing with it creates varied tones, from deep browns to light sepia.

Making the ink itself is easy as pie for there is no perfect formula. I used about a teaspoon of the powder to half a cup of lukewarm water, which resulted in a deep brown tint. Mix more water to the mixture and you get a lighter colour. You may use tap water as well, but lukewarm water dissolves the crystals faster. Just have a small jar ready and put in your preferred amount of crystals, fill the jar with water, and mix till there are no solid crystals left. Use as you would use regular ink for calligraphy. A little goes a long way!
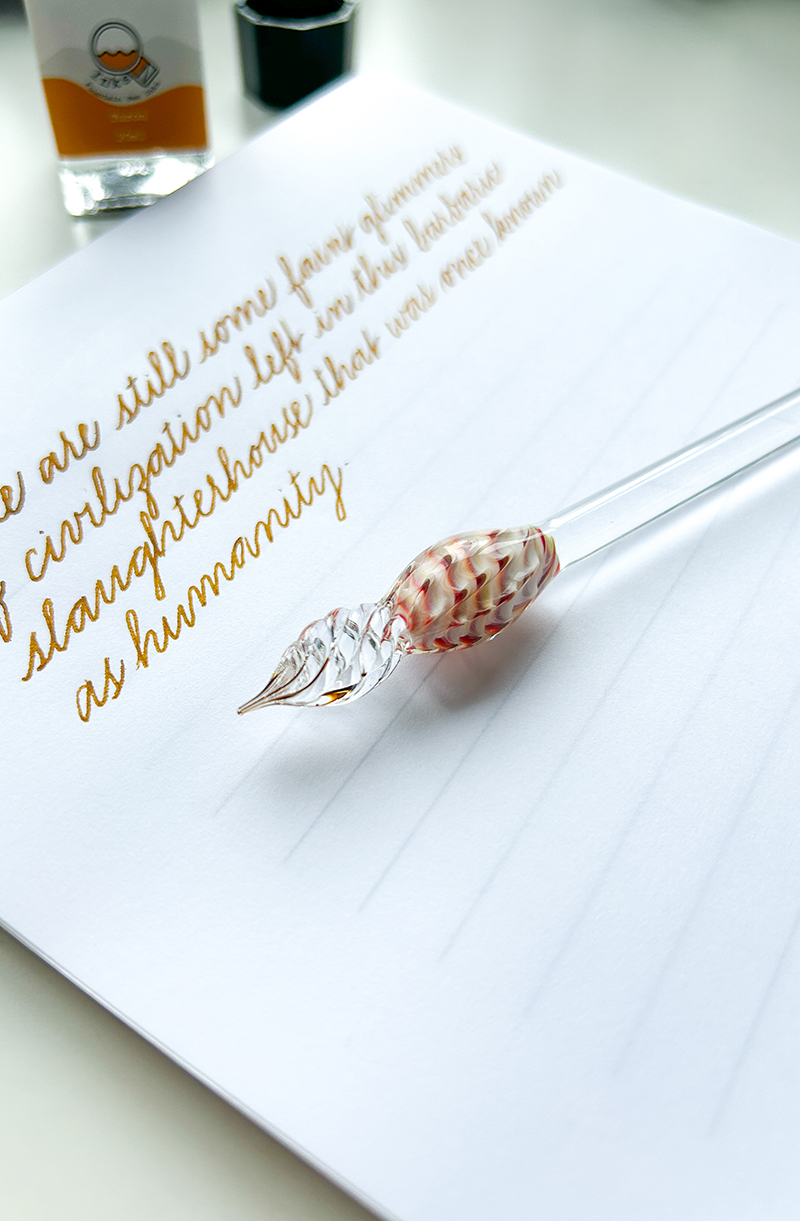
I was a bit wary about how thin the mixture turned out to be. In my experience, thin, watery inks are synonymous to feathering. But I proved myself wrong. Oh, how I loved writing with it! It was super smooth, and I adore how the hues vary the more I write. I had no problems with the ink flow at all. I swear I couldn’t stop writing with it! I used it on my Daler Rowney layout pad and have yet to try it on different types of paper, but so far, so good! You have to try it for yourself.

The walnut ink crystals were purchased from Paper & Ink Arts, written on a Daler Rowney layout pad with a Nikko G nib.

Leave a Reply